

i wear many hats. most of us do. i am a caregiver. i am cook. i am a launder. i am a chauffeur. i am landscaper (to a certain degree). i am a diyer. i am a blogger. i mean i could go on for days. but there's this one hat that is newly acquired. i am a MOPS creative coordinator for our local chapter. is it called a chapter? i'm not sure, but that's what i am referring to it as.
i joined MOPS in the 2014-2015 school year, because i needed an outlet. i needed somewhere to mingle and fellowship with other moms & just basically get that much needed me time that stay at home moms crave on the regular. plus hot breakfast, crafting & opportunities for you and your child to make lasting friendships? um yes please!
by the end of that school year, i was really being drawn to lead the creative aspect of MOPS, because hello, i love crafting & all that creative stuff. so i signed up, and got it. while it is a lot of work, researching, planning, pricing, budgeting, etc, the reward is so much greater. part of my responsibility is putting together fun crafts that are budget friendly, that can be completed while fellowshiping with others. this year i knew i wanted to do a tote bag at some point, because every mother out there hauls around all their kids ridiculous things whether they bring it from home, find it on a sidewalk, etc.
enter your terribly easy, budget friendly, totally custom tote bag.
supplies:
canvas tote bag (i bought ours here for $0.89 a piece)
1" painters tape
acrylic paint, 2 to 3 different colors
cardboard piece or cardstock the size of your tote bag
foam paint brush
paper cutter, optional
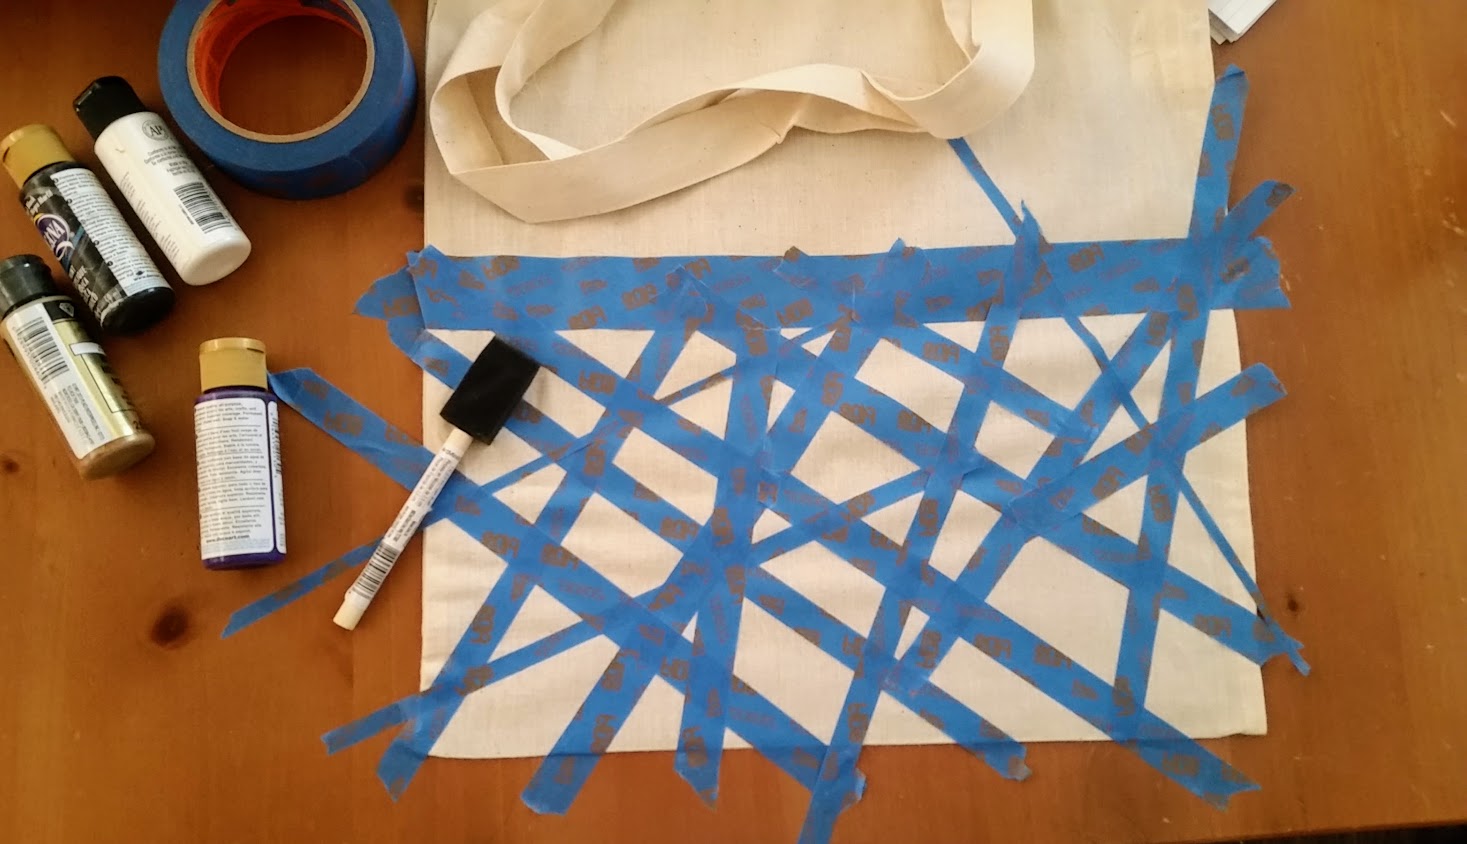
begin by placing your piece of cardstock or cardboard down inside your bag. this is to prevent any paint from bleeding through to the backside of your bag.
using your painter's tape, mark off your desired design on your bag. this is the fun part, because you can make any design you want. (tip: i used a paper cutter to make skinner pieces of tape) this design can be as big or small or complex or simple as you want it to be.
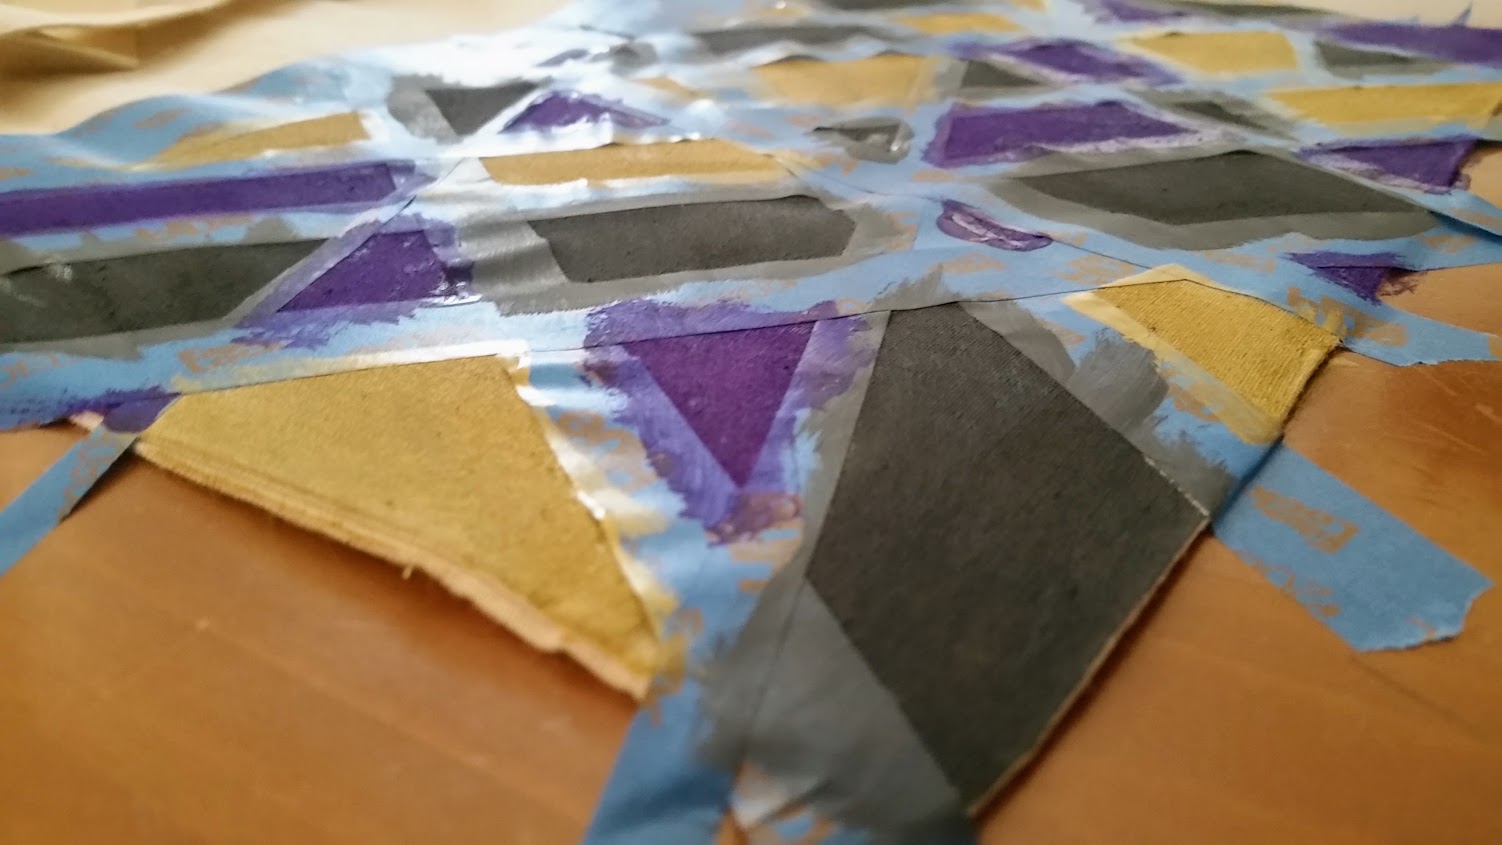
once your satisfied with your taped design, begin painting. (crucial tip: make sure your tape edges are sealed completely to your bag, otherwise you will get uncrisp lines. i got a few which you'll see in my finished product) i painted a few of one color, then pick up the next, and repeat.
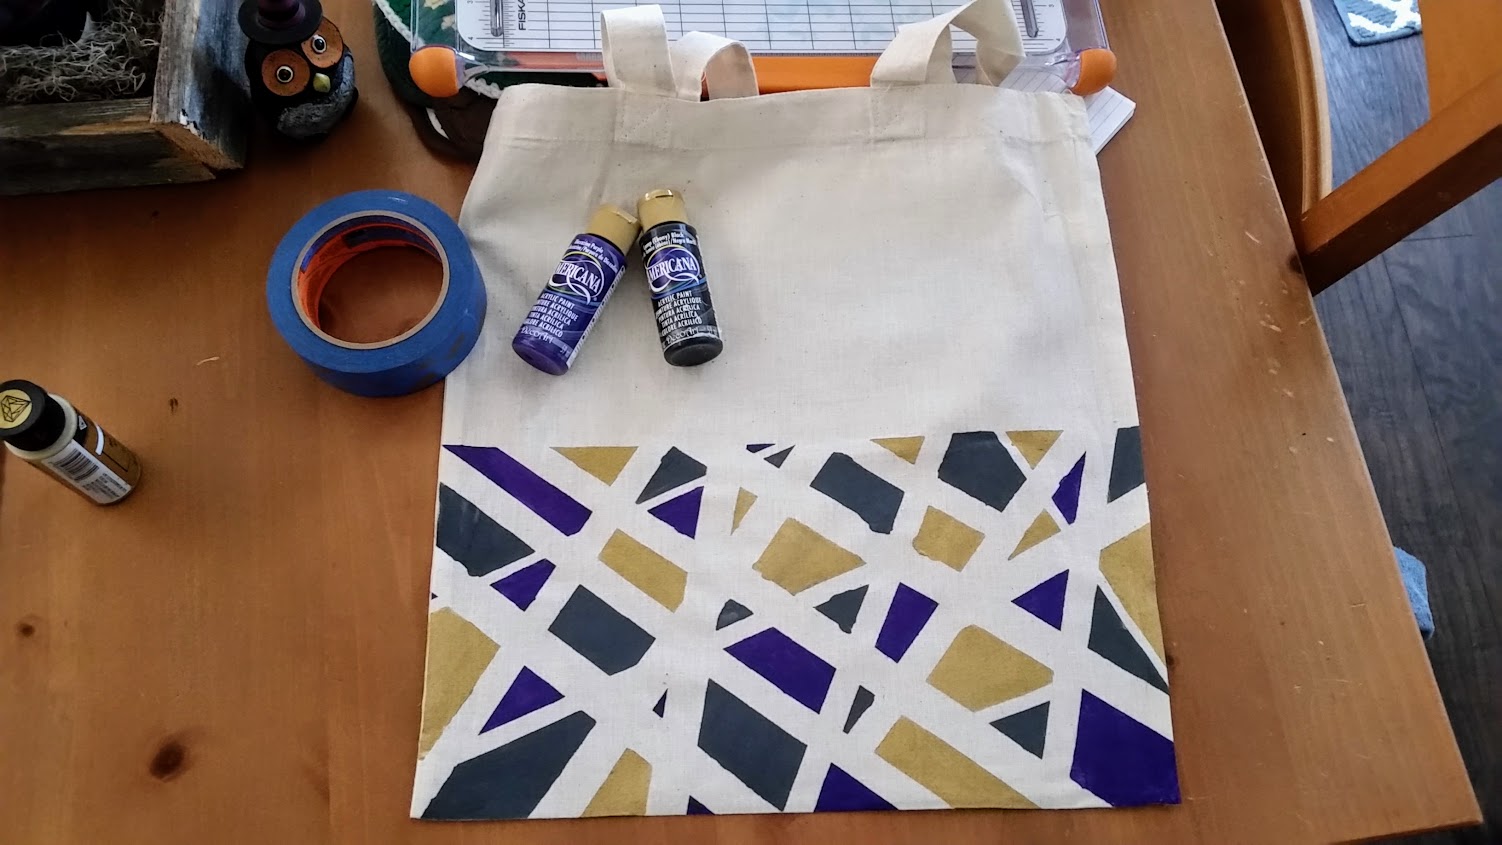
let your bag dry completely before removing the tape.
stuff with all your things & enjoy your one of a kind piece.
you can find more of our diy projects here.


No comments